1 背景
Ubuntu 20.04是目前较常用的稳定版本,也是很多云服务器厂商提供的最新系统,很多人用来搭建服务器,以支持自己的个人网站。常用的博客系统例如wordpress、typecho都需要nginx、mysql、php环境。
然而,网上的LNMP教程极其老旧,有以下问题:
- 大部分都是基于centos系统的教程,与ubuntu情况有出入。
- 使用的Ubuntu版本很旧,大部分都是18.04甚至还有在用16.04的,已经过时。有的明明是20.04,但是还在用apt-get,动摇对文章可行性的信心。
- 文章中提出的操作不可行,或者跳步,对初学者不友好。
- 排版混乱,可读性差,让人失去阅读兴趣。
本文旨在解决上述问题,提供一个在Ubuntu 20.04下,完全可行的安装搭建LNMP的教程。
涉及版本:
Ubuntu 20.04 LTS
nginx 1.18
MariaDB 10.31
PHP-FPM7.4等
注意,本文是在普通用户具有sudo权限的情况下适用的!
2 安装nginx
2.1 更新可用软件包列表
sudo apt install
2.2 安装nginx
sudo apt install nginx
2.3 编辑nginx配置
输入命令cd /etc/nginx/sites-enable进入目录,然后sudo rm -f default删除里面的默认配置。
命令sudo vim test新建配置文件,然后输入以下内容:
server {
    listen       80;
    root   /var/www/html;
    server_name  localhost;
    #charset koi8-r;
    #access_log  /var/log/nginx/log/host.access.log  main;
    #
    location / {
        index index.php index.html index.htm;
    }
    #error_page  404              /404.html;
    #redirect server error pages to the static page /50x.html
    #
    error_page   500 502 503 504  /50x.html;
    location = /50x.html {
        root   /var/www/html;
    }
    #pass the PHP scripts to FastCGI server listening on 127.0.0.1:9000
    #
    location ~ .php$ {
        fastcgi_pass   127.0.0.1:9000;
        fastcgi_index  index.php;
        fastcgi_param  SCRIPT_FILENAME  $document_root$fastcgi_script_name;
        include        fastcgi_params;
    }
}
2.4 启动、设置开机启动nginx
sudo systemctl start nginx
sudo systemctl enable nginx
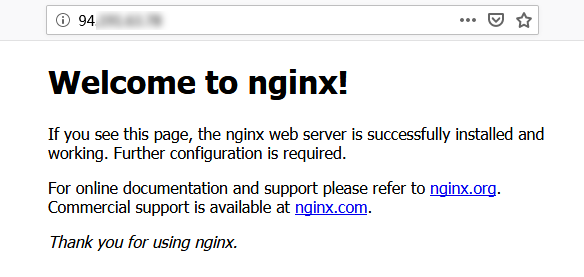
2.5 在本地浏览器中访问以下地址,查看 Nginx 服务是否正常运行。
http://云服务器实例的公网 IP
如果显示如下内容,说明配置成功。

3 安装数据库
3.1 安装mariadb数据库(也就是可以看成mysql的社区版本)。
sudo apt install mariadb-server mariadb-client
3.2 执行以下命令,启动 MariaDB 服务。
systemctl start mariadb
3.3 执行以下命令,设置 MariaDB 为开机自启动。
systemctl enable mariadb
3.4 执行以下命令,验证 MariaDB 是否安装成功。
sudo mysql
3.5 执行以下命令,退出 MariaDB。
q
4 安装PHP
4.1 安装php
sudo apt install php7.4-cli php7.4-common php7.4-mysqlnd php7.4-fpm
4.2 *观察安装的版本,如果是7.4,则执行以下命令,启动 PHP-FPM 服务。否则根据版本自行调整。从此往下均只支持7.4,其他版本未做验证,特此说明!
systemctl start php7.4-fpm
执行以下命令,设置 PHP-FPM 服务为开机自启动。
systemctl enable php7.4-fpm
4.3 修改nginx配置以支持php
输入
sudo vim /etc/nginx/sites-enable/test
按下i进入编辑模式,然后把里面fastcgi_pass那一行改成:
fastcgi_pass unix:/var/run/php/php7.4-fpm.sock;
然后按下esc,然后按下:,然后输入wq,然后回车保存退出。
注意:本小节仅支持php-fpm 7.4版本,其他版本未做验证,特此说明!!!!
4.4 验证环境配置
如果/var/www/html文件夹下有其他文件,先用rm命令删掉。
然后执行以下命令,创建测试文件。
sudo vim /var/www/html/index.php
然后,按下i进入编辑模式,输入<?php phpinfo(); ?>,然后按下esc,然后按下:,然后输入wq,然后回车保存退出。
执行以下命令,重启 Nginx 服务。
sudo systemctl restart nginx
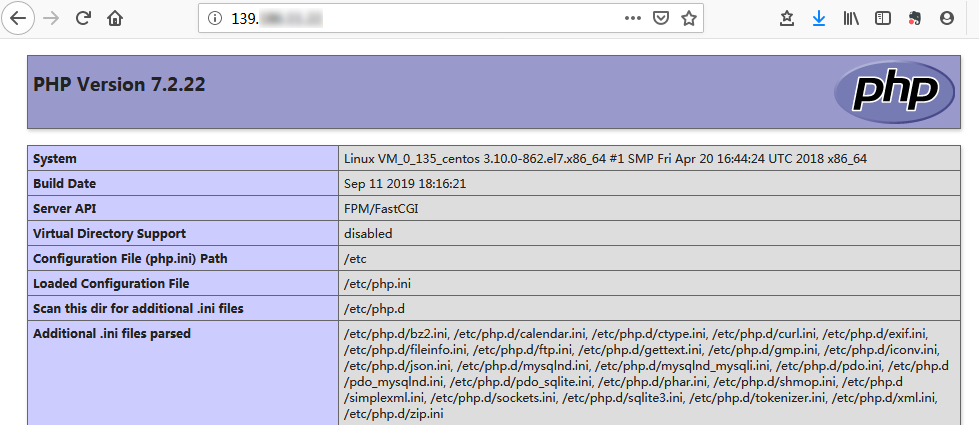
然后在本地浏览器中访问如下地址,查看环境配置是否成功。
http://云服务器实例的公网 IP
显示结果如下, 则说明环境配置成功。注意图片仅供示例,具体版本以实际为准!

注意:本小节仅支持php-fpm 7.4版本,其他版本未做验证,特此说明!!!!

